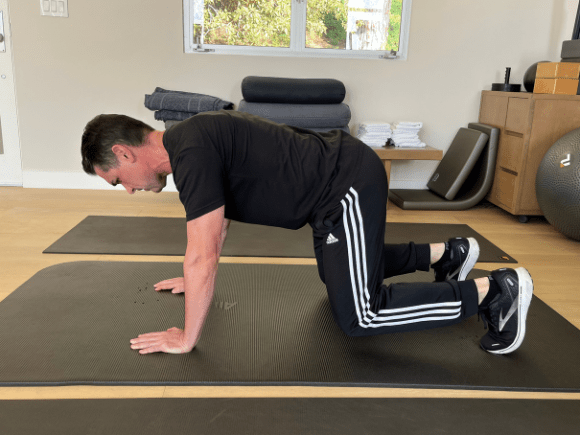
Wall Slide Exercises
Do you have tight shoulders? Then you need to be doing wall slide exercises.
As it happens, the wall slide exercise is an excellent way to improve shoulder health. Not only can this exercise help to improve the range of motion of the shoulder, but it can also help to restore the natural sliding motion of the scapula (shoulder blades) as it glides on the rib cage.
Regularly performing this exercise and variations of it can help to improve scapular stability and upward rotation as well. Additionally, it can improve shoulder mobility, shoulder flexibility and motor control of the associated joint actions of your shoulders.
In this article, I’ll reveal how to do the wall slide exercises plus its variations. In addition, I’ll cover why foam rolling is the best precursor to wall slides and how you can implement this modality into your workout routine.
So let’s get started.
KEY TAKEAWAYS:
- The Benefits Of Wall Slides
- Why Foam Rolling Is The Best Precursor To Wall Slides
- How To Do The Wall Slide Exercise
- Wall Slide Exercises: 3 Variations
The Benefits Of Wall Slides
Notably, wall slides are helpful to reduce shoulder pain associated with shoulder impingement syndrome or a frozen shoulder. Consequently, these conditions can limit overhead movements (shoulder abduction) if left untreated. While this exercise is beneficial in treating shoulder limitations for the general population, these exercises—and their variations—are also perfect for overhead athletes in the following sports: baseball, softball, football (quarterbacks), soccer (goalies), volleyball and basketball players.
For individuals without pain:
If you’re pain free, you can implement this movement as a part of your warm-up or as an accessory move in between big complex lifts. By including these regularly in your strength training program you’ll maintain optimal range of motion and shoulder mechanics.
For individuals with pain:
If you’re experiencing pain related to limited shoulder flexibility and shoulder mobility, it’s recommended that you see a doctor, physical therapist and ultimately, a certified personal trainer before performing this exercise.
Pro Tip: Perform At Home Or Gym
One of the great things about this exercise is it can be done at home or the gym—anywhere and anytime.
Additional Learning
Foam Rolling: Upper Back & Shoulders (Tutorial)
CLICK HERE To Learn How To Foam Roll Your Upper Back and Shoulders
Foam Rolling: The Best Precursor To Wall Slides
In my opinion, foam rolling is the best precursor to wall slides and for good reason. Namely, to loosen the soft tissue—muscles and fascia—of the thoracic spine (upper back) and surrounding tissues of the shoulder joints. Foam rolling can also help to restore thoracic mobility when performed with specific rolling techniques and thoracic joint mobilizations.
The muscles that should be foam rolled are:
- Upper Trapezius aka Upper Traps
- Lower Trapezius aka Lower Traps
- Latissimus Dorsi aka Lats
- Rhomboids
- Shoulders: Deltoids & Rotators
Here’s a great visual of these muscle groups courtesy of LOR Physical Therapy.
Additional Learning
Foam Rolling: Upper Back & Shoulders (Tutorial)
CLICK HERE To Learn How To Foam Roll Your Upper Back and Shoulders
How To Do Wall Slide Exercises
Time needed: 2 minutes
Scapular Wall Slides: Proper Form and Technique
- Initial Set up/ Standing Position
Begin by leaning your back against a wall with a slight bend in your knees. I refer to this stance as having “soft knees.” Your low back should be pressed into the wall, as well as your scapula (shoulder blades.) Raise your arms to the side and form a 90° angle. In this position, your elbows and the back of your hand should be touching the wall.
- How To Begin This Movement
From this point, begin to slowly move your arms overhead simulating that of the overhead press exercise.
- Finish
Complete the repetition by returning your arms to the starting point. Repeat this drill for 5-10 repetitions.
Here’s how to do standing wall slides.
2 Common Mistakes To Avoid With Wall Slides
It’s common to see hand and elbow position compromised in individuals with tight shoulders. Try to maintain elbow and hand contact with the wall throughout the entire movement. You should avoid compensation by NOT allowing a gap between your wrists and finger tips. The back of your hand should always be placed against the wall. If you cannot maintain optimal position, limit your range of motion until you regain range of motion.
Mid-back and low back position is often compromised while performing this exercise drill. Compensation occurs in these regions when individuals try to force full overhead range of motion. In this case, shorten the overhead movement to maintain mid and low back contact with the wall throughout this drill.
3 Variations Of The Wall Slide Exercise
1. Seated Wall Slides
Here’s how to do seated wall slides.
Watch this video on YouTube
2. Floor Slides
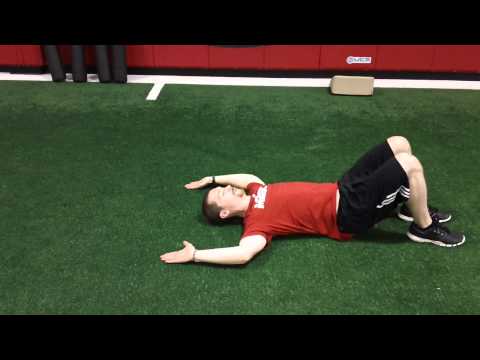
Here’s how to do floor slides.
Watch this video on YouTube
3. Front Wall Slides (Regression)
Use the front wall slide variation if you have really tight shoulders.
Watch this video on YouTube
Conclusion
In summary, performing wall slide exercises is one of the best ways to improve shoulder mobility, good posture and restore full range of motion of the shoulders.
As can be seen, using a foam roller to loosen soft tissue can significantly influence your body’s ability to perform overhead movements. When used in conjunction with foam rolling, the wall slide exercise can be beneficial to improve scapular upward rotation and improve functionality of the muscles of the shoulder.
On the whole, I highly recommend you include foam rolling and wall slides regularly in your workout routines. Not only will you improve mobility, but you’re going to “bullet proof” your shoulders from injury and just feel better overall.
Until next time,
Christian Graham—NSCA-CPT, CFSC, FMS2
Functional Strength & Mobility Specialist – @Body360Fit
PS. And remember, you’re just one workout away…
PPS. Did you enjoy this shoulder mobility tutorial? If so, please share it with your friends on Twitter, Facebook and Pinterest.
If you have have any questions, please ask in the comments below. You can also send me a message via the contact form.
Additional Learning
The Kettlebell Halo: A Simple How To Guide
For more exercises to mobilize and strengthen the shoulders CLICK HERE
Foam Rolling: Upper Back & Shoulders (Tutorial)
CLICK HERE To Learn How To Foam Roll Your Upper Back and Shoulders
Latest Articles
- Ditch the Barbell: 15 Killer Barbell Front Squat Alternatives (with Videos!)
- 7 Unilateral Back Exercises You NEED to Be Doing (For Symmetry & Strength)
- Vega vs. Orgain Protein Powder: A Head-to-Head Comparison
- Indulge Your Cravings: Healthy Cookies and Cream Protein Powder Recipe
- Tribulus Terretris Spotlight: Unveiling the Top 11 Tribulus Supplements with Expert Insights





![Full Body Kettlebell Workout [PDF] | Body360 Fit](https://body360fit.com/wp-content/uploads/2021/01/Full-Body-Kettlebell-Workout-PDF.png)
