
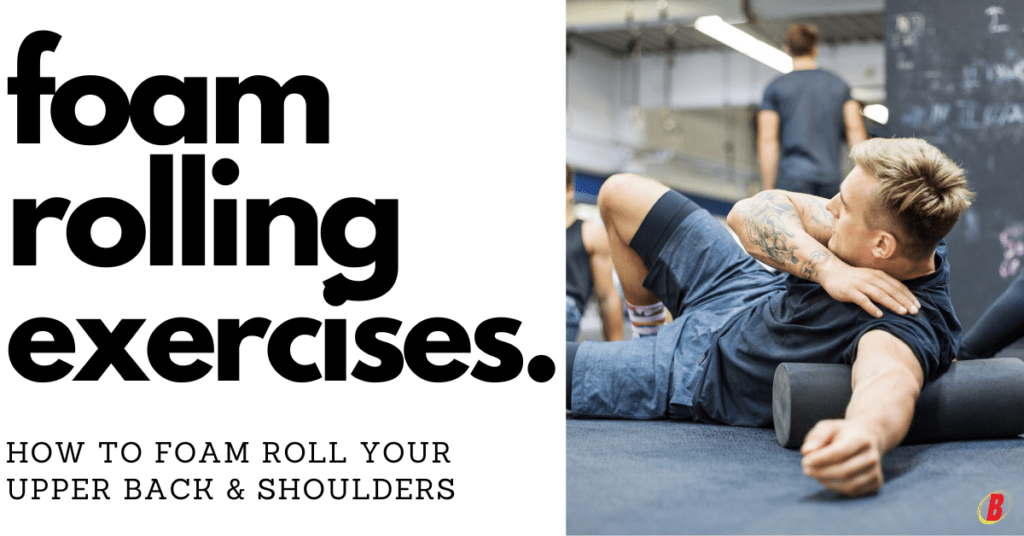
How to Foam Roll Upper Back and Shoulders
Estimated reading time: 10 minutes
Today, I’m going to show you how to foam roll your upper back and shoulders. But first, let’s understand what foam rolling is and why self-myofascial release is beneficial to your health.
As indicated by the National Library of Medicine, there’s compelling evidence that foam rolling the muscles surrounding the upper spine and shoulders can significantly improve nervous system response, thereby reducing the tone of perpetually tight muscles, soft tissue, connective tissue, and muscle fascia.
In this case, the user can expect excellent benefits in tissue quality, including:
- Reduced muscle soreness and inflammation
- Reduced neck pain, shoulder pain, and upper back pain
- Fewer muscle knots and reduced muscle tension
- Better flexibility and improved range of motion
Furthermore, individuals who use this modality as part of their daily programming may also improve overall muscular performance and recovery.
So let’s take a deeper dive into these topics below.
Key Takeaways
- What Is Foam Rolling & Why It’s Important
- Types of Foam Rollers and Mobility Devices
- How To Choose A Foam Roller
- How To Foam Roll Upper Back Shoulders Properly Every Time!
- Thoracic Spine Mobilizations
- Foam Rolling Exercises PDF (Back & Shoulders)

What is Foam Rolling and Why It’s Important?
Foam rolling is a great tool to release trigger points (painful, tender spots within the muscle tissue), improve range of motion and tissue quality, as well as aid in long-term mobility changes.
Generally speaking, foam rolling can be used before and after your workouts. Therefore, it’s recommended that you include this modality in your dynamic warmup and then use it after the conditioning phase of your workout for recovery.
As a personal trainer, I include foam rolling as the first step in every warm-up and in every client’s routine.
Types of Foam Rollers & Mobility Devices
These days, there are many types of foam rollers and mobility devices available—some are more or less dense and longer or shorter, and others are unique shapes with bumps and ridges, unlike the traditional cylinder-type rollers of the past.
For this reason, it can be unclear for the everyday gym-goer to know precisely which rolling device is perfect for their needs. The truth is, having a variety of these devices at your disposal is important as you’ll use different types of rollers or balls to varying times within your workout phases.
Here’s a list of foam rollers and trigger point devices for the best results:
- Trigger Point Therapy Devices
- Regular Foam Roller
- Hyperice Vibrating Foam Rollers
- Lacrosse Ball
- Tennis Ball
- Rumble Roller
- Massage Sticks
- Foam Balls
How to Choose a Foam Roller
In the past, foam rollers were softer and would lose their rigid, cylinder-like shape after a short time. In contrast to today, modern foam rollers and mobility devices have improved in many ways, including better size and shape and greater durability.
Here are some of the things to look for when choosing the best foam rollers for you:
Shape & Size: Believe it or not, shape and size do matter, and there are different devices for different concerns. An example would be choosing a lacrosse ball to work on a particular trigger point in the soft muscle tissue.
Density: Rigidity and density are key factors to consider when choosing a foam roller. If you have a high discomfort tolerance, a more rigid device will be more beneficial. You should consider having a second, less dense device as well.
Texture is a significant consideration as well. Rollers with high-profile ridges and knobs, such as those from Rumble Roller, can help penetrate deeply into stubborn knots and muscle tissue.
Pro Tip: Rumble Roller
A roller with ridges is a must-have in my opinion. A device like this has a unique way of releasing tight muscle tissue.
Foam Roller Exercises: How to Use a Foam Roller on the Upper Back and Shoulders
To demonstrate how to foam roll your upper back and shoulders effectively, I’ve included verbal instructions and video tutorials below. But before we begin, here are a few best practices and notable points to help improve your foam-rolling game.
5 Foam Rolling Best Practices & Considerations
Everyone is different, but generally speaking, your level of discomfort should be a 6-7 out of 10.
Best practices are to roll each area back and forth approximately 6-10 times.
Foam rolling should be included in every workout—pre workout & post workout—and can be used as an accessory on off-days for faster workout recovery as well.
Foam rolling should be included as the first component of your warm-up phase before any breathing or movement drills. You can also add foam rolling to the cool-down phase after your workout.
It’s recommended that you spend extra time on very tender areas. For particularly tight trigger points, use a lacrosse ball or a similar tool to release them.

Foam Rolling Your Lats in the Supine Position
Time needed: 5 minutes
How to Foam Roll the Lats Properly
- Initial Setup
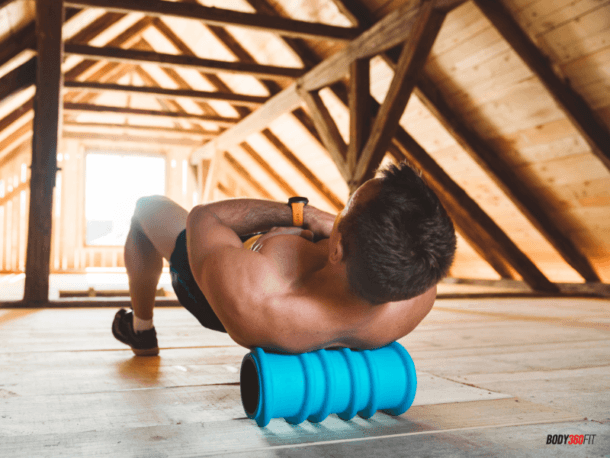
First, lie on your back in the supine position (face up), with your shoulder blades pressed against the foam-rolling device. In doing so, the foam roller will be placed horizontally against your upper back. Your butt should be on the floor with your knees bent and your feet flat.
- How To Begin
Second, wrap your arms across your chest and around your shoulders, as if you’re hugging yourself. Continue by lifting your hips off the floor.
- Foam Rolling Movement
Third, begin to roll your body back and forth thereby massaging the muscle tissue. Avoid moving too far down the spine and stop at the base of the thoracic spine and the beginning of the low back. Continue rolling for 6-10 times, or until you’ve loosened the tissue.
How to Get More Specific with Trigger Points
My personal preference for tackling really tight, stubborn muscle tissue is to slightly modify the above technique by rolling along one side of the spine at a time.
Here’s How to Do it:
- Begin by placing the foam roller against your shoulder blades. In the starting position, your butt should be on the floor with your knees bent and your feet flat.
- Next, wrap your arms around your shoulders.
- Then, lift your butt off the floor and adjust your position by gently shifting your weight to one side of your spine. Essentially, you’re lifting one side of your back off the roller and applying the device’s pressure to one side only.
- Proceed to roll back and forth approximately 6-10 times or until you’ve relieved any tender spots.
Progression
You can progress this variation further by using a rumble roller (rigid rolling device—mentioned previously) and also by lifting your hips slightly higher off the floor. In doing so, you’ll have the added pressure of your body weight against the roller and in a very definite position, too. Next, roll back and forth on the roller and then proceed to the opposite side.
Rolling Your Lats in the Side Lying Position
In the side-lying position, place the foam roller against the side of your body (on the lat), a few inches below your armpit. Your arm should be extended overhead, palms facing up. Next, you’ll roll back and forth, massaging the lat muscle. You can also use the cross-friction method here.
Cross Friction Method: What is it?
Using cross-friction is one of my favorite ways to loosen tight soft tissue significantly. You can use this technique in other areas as well, but for our purposes here today, we’ll focus solely on cross friction for the lats.
Cross friction is a technique in which you move your body horizontally, rather than vertically (back and forth lengthwise). Essentially, you’re shifting the muscles across the roller to accomplish this action.
Pro Tip: Use Cross Friction Method
This technique of cross friction or shifting the muscles across the the roller can significantly identify and loosen tight areas.
Foam Rolling Your Posterior Shoulders/Armpit Area in the Side Lying Position
- First, begin in a side-lying position with your bottom arm extended and draping over the foam roller. Your palm should be facing up.
- Second, lift your body slightly off the floor and roll down and back approximately 6-10 times.
- Third, progress to the top of your lat and armpit area. Proceed to roll this area approximately 6-10 times as well.
Pro Tip: For Muscle Tissue Sensitivity
The back of the shoulder/armpit area can be hyper-sensitive and painful. It’s recommended you avoid using too much pressure in this region.
How to Get More Specific
Once again, to progress this rolling technique, use the cross-friction method. To do so, you’ll fold your chest muscles towards the floor and then unfold by opening your chest towards the ceiling. With this technique, your body should stay in one place.
Note: You are not rolling back and forth. Once completed, you can adjust your body and move to another tight area.

Thoracic Extension Mobility Drills: Thoracic Spine Mobilizations
Thoracic mobilizations are a great way to help further mobilize the vertebral joints of your thoracic spine.
Here are a few benefits:
- Helps To Mobilize the Rib Cage
- Reduces Shoulder Pain
- Reduces Back Pain
- Reduces Neck Pain
Here’s how you do them:
- Begin by lying on your back with your thoracic spine (mid back) resting on a foam roller. Your butt should be on the floor, your knees should be bent.
- Second, place your hands around the back of your head for support. Your elbows and forearms should be positioned close to your face.
- Finally, mobilize the joints of the t-spine by lowering your elbows towards the floor while draping your body over the foam roller. A good visual would be the fanning of a butterfly’s wings.
- Repeat this action about 3-4 times as you move along the length of your thoracic spine.
T-Spine Mobilization Progression
To progress with exercise, you can extend your arms overhead and ultimately extend both legs straight for full body extension. Next, move your body to the next area of your vertebral column. Remember, the adjustments in body position are very subtle, and you can cover the entire area in about four individual adjustments.
Pro-Tip: Thoracic Joint Mobilizations
I prefer to reset the legs to bent-knee position with your butt against the floor before moving to a new division of the back. I’ve found this to be “easier” on the spine without the added pressure of your body weight.
Here’s a short video demonstrating this below.
Final Thoughts
As shown above, learning to foam roll the upper back and shoulders is the best way to dramatically improve soft-tissue quality, reduce pain and inflammation, and prime the nervous system for sports performance and workout-related activity. Furthermore, it can reduce neck, shoulder, and back pain too.
It’s important to note that while foam rolling can be uncomfortable, it shouldn’t be painful. If you’re experiencing a high level of pain during this activity, I suggest you work with a massage therapist to address some of this tenderness, alongside your own daily rolling drills.
At the end of the day, it’s a good idea to include some form of soft-tissue work and foam rolling, both before and after your workouts, or even while you’re winding down.
Should you decide to commit to this therapy, I can assure you the benefits will be dramatic, and you’ll be feeling and moving better in a short period of time. Give it a try!
Until next time,
Christian Graham—NSCA-CPT, CFSC, FMS2
Functional Strength & Mobility Specialist – @Body360Fit
PS. And remember, you’re just one workout away…
PPS. Did you enjoy this foam rolling tutorial? If so, please share it with your friends on Twitter, Facebook and Pinterest.
If you have any questions, please ask in the comments below. You can also send me a message via the contact form.
Additional Learning
Wall Slide Exercises Tutorial
CLICK HERE To Learn How To Improve Shoulder Mobility With Wall Slide Exercises
Latest Posts
- How Can Personal Training Help You Reach Your Goals in Los Angeles?
- Who Should Work With a Personal Trainer in West Hollywood?
- Why Is Personal Training Worth It In a Private Gym?
- How Often Should You See a Personal Trainer: Frequency Tips for Best Results in Personal Training
- What Should Beginners Know About Personal Training: Tips for Success in Your First Session

")

![Full Body Kettlebell Workout [PDF] | Body360 Fit](https://body360fit.com/wp-content/uploads/2021/01/Full-Body-Kettlebell-Workout-PDF.png)