Estimated reading time: 29 minutes
Cable Bicep Curl Alternative
In fitness, opting for a cable bicep curl alternative has become a go-to choice in pursuing well-defined biceps. While cable bicep curls have long been a staple in arm workouts, diversifying your routine with free weights such as dumbbells and barbells can bring new challenges and stimulate muscle growth.
Whether seeking variety or aiming to target your biceps from different angles, this article explores 17 cable bicep curl alternatives, shedding light on their benefits, proper form, equipment needed, and primary and assisting muscle movers.
Table of contents
- Cable Bicep Curl Alternative
- Anatomy of the Biceps Muscles: Understanding the Foundations
- Key Benefits and Muscles Worked: Cable Bicep Curl Alternative
- Cable Bicep Curl Alternative: Exploring 17 Effective Exercises for Sculpted Arms
- 1. Barbell Curls (Underhand Grip)
- 2. Barbell EZ Bar Curl
- 3. Barbell Drag Curls
- 4. Barbell Reverse Grip Curls
- 5. Band Resisted Barbell Curls
- 6. Barbell 21’s
- 7. Dumbbell 21’s
- 8. Dumbbell Concentration Curls
- 9. Dumbbell Hammer Curls (Neutral Grip)
- 10. Preacher Curl Exercise
- 11. Resistance Band Curls
- 12. Incline Dumbbell Curls
- 13. Seated Dumbbell Curls
- 14. Balance Board Dumbbell or Barbell Curls
- 15. Bosu Ball Hammer Curls
- 16. Barbell Spider Curls
- Conclusion: Elevating Your Bicep Workout with Cable Bicep Curl Alternatives
Key Takeaways
- Cable bicep curl alternatives provide variety and challenge to your arm workout routine.
- Understanding the anatomy of the bicep is crucial for practical training.
- The 16 best cable bicep curl alternatives include various barbell and dumbbell exercises, offering a range of benefits.
- Proper form, equipment, and muscle engagement are crucial considerations for each exercise.
- Incorporating these alternatives can contribute to overall bicep development and prevent workout plateaus.
Anatomy of the Biceps Muscles: Understanding the Foundations
Before diving deep into cable bicep curl alternatives, it’s essential to understand the anatomy of the bicep muscles. The biceps brachii, a prominent muscle in the upper arm, consists of the long and short heads.
According to the Biceps Guide To Growing Biceps by Top Shape Now, the long head “originates from the supraglenoid tubercle of the scapula, while the short head originates from the coracoid process.” Both heads are inserted at the radial tuberosity, working in tandem to flex the elbow and supinate the forearm.
The brachialis, another muscle beneath the biceps brachii, also plays a role in elbow flexion. Appreciating these origins and insertions is fundamental to targeting these muscles effectively.
Here’s a great visual from Open Fit.
Key Benefits and Muscles Worked: Cable Bicep Curl Alternative
Engaging in bicep exercises, including cable bicep curl alternatives, offers many benefits. These exercises primarily target the biceps brachii, stimulating muscle growth and promoting strength. The brachialis and brachioradialis are activated, contributing to well-rounded arm development.
Here are some key benefits and muscles worked:
Muscles Worked: Biceps Brachii (long and short heads)
- Brachialis
- Brachioradialis
Benefits:
- Increased muscle mass and definition
- Improved strength for daily activities
- Enhanced grip strength and forearm muscle strength
Cable Bicep Curl Alternative: Exploring 17 Effective Exercises for Sculpted Arms
1. Barbell Curls (Underhand Grip)
Exercise Description: Performing a barbell curl is a classic and effective exercise targeting the biceps.
Muscles Targeted:
- Primary: Biceps Brachii
- Assisting: Brachialis, Brachioradialis
Equipment Needed:
- Barbell
Steps: Here’s a step-by-step guide on how to perform a barbell curl.
- Starting Position: Stand with your feet shoulder-width apart. Hold a barbell with your palms up (underhand grip). Your hands should be placed slightly wider than shoulder-width apart. Allow the barbell to hang in front of your thighs at arm’s length.
- Body Position: Keep your chest up and shoulders back, and maintain a straight posture throughout the exercise. Engage your core to stabilize your spine.
- Elbow Position: With your upper arms stationary, bend your elbows and lift the barbell toward your chest. Ensure your elbows are close to your torso during the entire movement.
- Curling Movement: Exhale as you curl the barbell upward by flexing your biceps. Control the movement to avoid swinging.
- Top Position: At the top of the movement, your forearms should be perpendicular to the floor, and the barbell should be close to your chest. Squeeze your biceps at the top of the contraction for maximum muscle engagement.
- Lowering Phase: Inhale as you lower the barbell.
Key Tips:
- Use a grip that is comfortable for you, typically slightly wider than shoulder-width.
- Keep your wrists in a neutral position to reduce strain on the joints.
- Focus on a full range of motion, allowing your elbows to fully extend and contract your biceps at the top.
- Avoid excessive leaning back or using your back to lift the weight; the movement should come from the biceps.
Common Mistakes to Avoid:
- Swinging the Body: Maintain strict form and avoid using momentum to lift the barbell.
- Lifting Too Heavy: Use the appropriate weight to perform the exercise correctly. Lifting too heavy can compromise your technique.
- Incomplete Range of Motion: Make sure to fully extend your arm movement and contract your biceps at the top.
Incorporate barbell curls into your bicep workout to build muscular biceps, emphasizing the upper arms.
2. Barbell EZ Bar Curl
Watch this video on YouTube
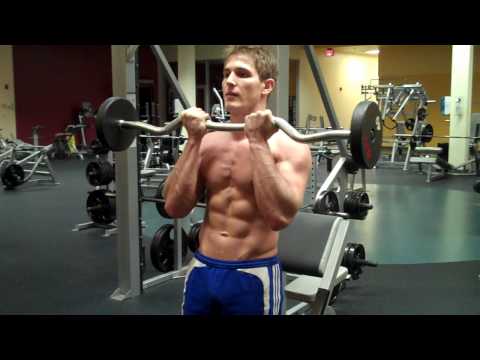
Exercise Description: Similar to barbell curls but using an EZ bar, this variation reduces wrist strain while effectively engaging the biceps.
- How to Perform Barbell EZ Curls: Similar to barbell curls, but with an EZ bar, reducing wrist strain.
- Equipment Needed: EZ Bar
- Primary Movers: Biceps Brachii
- Assisting Movers: Brachialis, Brachioradialis
- Key Benefits: Wrist-friendly alternative, varied muscle activation.
Steps: Here’s a step-by-step guide on how to perform this exercise.
- Starting Position: Stand with your feet shoulder-width apart.Hold the EZ curl bar with an underhand grip (palms facing upward), hands placed on the angled grips of the bar.
- Body Position: Keep your chest up shoulders back, and maintain a straight posture throughout the exercise. Engage your core to stabilize your spine.
- Elbow Position: Allow your arms to fully extend, letting the EZ curl bar hang in front of your thighs. Keep your elbows close to your torso, and ensure your wrists are neutral.
- Curling Movement: Exhale as you curl the EZ curl bar upward by flexing your biceps. Keep the movement controlled, avoiding any swinging or jerking. Focus on squeezing your biceps at the top of the contraction.
- Top Position: At the top of the movement, your forearms should be perpendicular to the floor, and the EZ curl bar should be close to your chest. Hold the contracted position for a brief moment to maximize muscle engagement.
- Lowering Phase: Inhale as you lower the EZ curl bar back to the starting position in a controlled manner. Maintain the neutral wrist position and avoid letting the weight drop quickly.
Key Tips:
- Use a grip on the EZ curl bar that is comfortable for you, typically with your hands shoulder-width apart on the angled grips.
- Keep your wrists in a neutral position to reduce strain on the joints.
- Focus on a full range of motion, allowing your elbows to fully extend and contract your biceps at the top.
Common Mistakes to Avoid:
- Swinging the Body: Maintain strict form and avoid using momentum to lift the EZ curl bar.
- Lifting Too Heavy: Choose an appropriate to execute the exercise with proper form. Lifting too heavy can compromise your technique.
- Incomplete Range of Motion: Make sure to coextend your arms at the bottom of the movement and contract your biceps at the top.
Incorporate barbell EZ curls into your bicep workout to effectively target your upper arms while minimizing stress on your wrists.
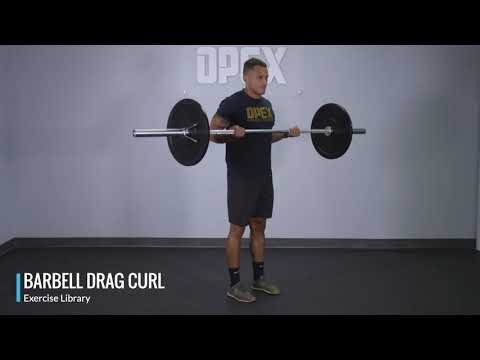
3. Barbell Drag Curls
Watch this video on YouTube
Performing a barbell drag curl involves a unique technique that emphasizes keeping the barbell close to your body throughout the movement.
Muscles Targeted: Primary: Biceps Brachii. Assisting: Brachialis, Brachioradialis
Equipment Needed: Barbell
Steps: Here’s a step-by-step guide on how to perform this exercise.
- Starting Position: Stand upright with your feet shoulder-width apart. Hold a barbell with an underhand grip or palms facing up; hands placed slightly narrower than shoulder-width apart.
- Body Position: Keep your chest up shoulders back, and maintain a straight posture. Position the barbell in front of your thighs, arms fully extended.
- Elbow Position: Bend your elbows slightly to create tension in your biceps. Ensure your elbows are close to your torso, almost touching your ribcage.
- Curling Movement: Lift the barbell by flexing your elbows while keeping them close to your body. Focus on dragging the barbell along your torso throughout the entire range of motion.
- Contraction: At the top of the movement, contract your biceps and hold briefly to maximize muscle engagement.
- Lowering Phase: Lower the barbell in a controlled manner, maintaining the close-to-body position. Keep a slight bend in your knees, and avoid using momentum. Focus on the mind-muscle connection, feeling the tension in your biceps throughout the exercise.
Key Tips:
- Maintain a smooth and controlled motion to ensure proper form and prevent swinging.
- The range of motion in a drag curl is shorter than traditional curls, focusing on the peak contraction of the biceps.
- Use an appropriate weight to maintain good form and complete the desired reps.
Common Mistakes to Avoid:
- Excessive Body Movement: Keep your body still and avoid using your back or shoulders to lift the bar.
- Gripping Too Wide: A narrower grip ensures the barbell stays close to your body, targeting the biceps effectively.
- Using Momentum: Control the movement throughout, avoiding jerking or swinging the barbell.
Incorporating barbell drag curls into your bicep workout can stimulate your muscles and contribute to well-rounded arm development.
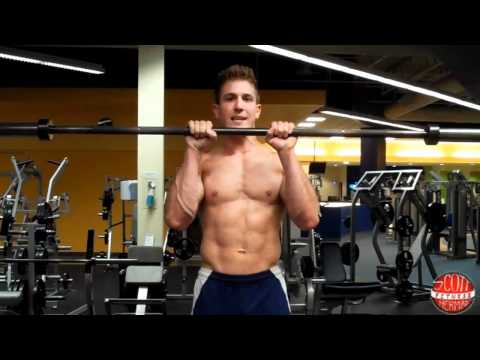
4. Barbell Reverse Grip Curls
Watch this video on YouTube
Exercise Description: Targets the short head of the biceps by gripping the barbell with palms facing downward during the curl.
- Equipment Needed: Barbell
- Primary Movers: Biceps Brachii (emphasis on the short head)
- Assisting Movers: Brachialis, Brachioradialis
- Key Benefits: Emphasizes the short head of the biceps and provides variety.
Steps: Here’s a step-by-step guide on how to perform this exercise.
- Starting Position: Stand with your feet shoulder-width apart. Hold a barbell with a reverse or underhand grip (palms facing upward); hands placed slightly narrower than shoulder-width apart.
- Body Position: Keep your chest up shoulders back, and maintain a straight posture throughout the exercise. Engage your core to stabilize your spine. Elbow Position: Allow your arms to fully extend, letting the barbell hang in front of your thighs. Keep your elbows close to your torso, and ensure your wrists are neutral.
- Curling Movement: Exhale as you curl the barbell upward by flexing your biceps. Keep the movement controlled, avoiding any swinging or jerking. Focus on squeezing your biceps at the top.
- Top Position: At the top of the movement, your forearms should be perpendicular to the floor, and the barbell should be close to your chest. Hold the contracted position for a brief moment to maximize muscle engagement.
- Lowering Phase: Inhale as you lower the barbell. Maintain the neutral wrist position and avoid letting the weight drop quickly.
Key Tips:
- Use a grip on the barbell that is comfortable for you, typically with your hands slightly narrower than shoulder-width apart.
- Keep your wrists in a neutral position to reduce strain on the joints.
- Focus on a full range of motion, allowing your elbows to fully extend and contract your biceps at the top.
Common Mistakes to Avoid:
- Swinging the Body: Maintain strict form and avoid using momentum to lift the barbell.
- Lifting Too Heavy: Choose the correct weight. Lifting too heavy can compromise your technique.
- Incomplete Range of Motion: Extend your arms at the bottom of the movement and contract your biceps at the top.
Incorporate Barbell Reverse Grip Curls into your bicep workout to effectively target the short head of the biceps and add variety to your training routine.
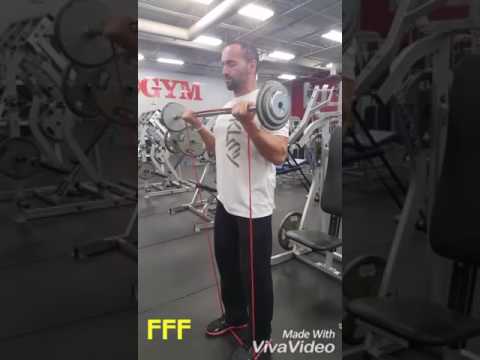
5. Band Resisted Barbell Curls
Exercise Description: Enhances resistance by incorporating bands, providing constant tension throughout the movement for increased muscle engagement.
- Equipment Needed: Barbell, Resistance Bands
- Primary Movers: Biceps Brachii
- Assisting Movers: Brachialis, Brachioradialis
- Key Benefits: Constant tension for muscle growth, engages stabilizing muscles.
Steps: Here’s a step-by-step guide on how to perform this exercise.
- Set Up: Attach one end of a resistance band to each end of the barbell. Make sure the bands are securely fastened. Load the Barbell: Load the barbell with the desired weight plates. Ensure the weight is appropriate for your fitness level and allows proper form.
- Starting Position: Stand with your feet shoulder-width apart. Hold the barbell with an underhand grip, hands placed slightly wider than shoulder-width apart.
- Body Position: Keep your chest up shoulders back, and maintain a straight posture throughout the exercise. Engage your core to stabilize your spine.
- Elbow Position: Allow your arms to extend fully, letting the barbell hang in front of your thighs.Keep your elbows close to your torso, and ensure your wrists are neutral.
- Curling Movement: Exhale as you curl the barbell upward by flexing your biceps. The resistance bands will add tension throughout the entire range of motion, increasing the difficulty of the exercise.
- Top Position: At the top of the movement, your forearms should be perpendicular to the floor, and the barbell should be close to your chest. Hold the contracted position for a brief moment to maximize muscle engagement.
- Lowering Phase: Inhale as you lower the barbell. Maintain the neutral wrist position and avoid letting the weight drop quickly.
Key Tips:
- Ensure the resistance bands are securely attached to the barbell to prevent accidents during the exercise.
- Choose a band with an appropriate level of resistance. You can adjust the tension by using different bands or changing their placement on the barbell.
- Focus on a full range of motion, allowing your elbows to fully extend and contract your biceps at the top.
Common Mistakes to Avoid:
- Swinging the Body: Maintain strict form and avoid using momentum to lift the barbell.
- Lifting Too Heavy: Choose the proper. The bands already add resistance, so start with a moderate weight.
Incorporate Band Resisted Barbell Curls into your bicep workout to intensify the exercise and challenge your muscles with constant tension.
6. Barbell 21’s
Watch this video on YouTube
Exercise Description: This involves dividing the curl into three parts—bottom Half, top Half, and full range of motion—adding variety and intensity to bicep training
- Equipment Needed: Barbell
- Primary Movers: Biceps Brachii
- Assisting Movers: Brachialis, Brachioradialis
- Key Benefits: Targets different parts of the bicep and enhances muscle endurance.
Steps: Here’s a step-by-step guide on how to perform this exercise
- Set Up: Load the barbell with the desired weight plates. Starting with a lighter weight is recommended since the cumulative effect of 21 repetitions can be challenging.
- Grip: Begin with your feet shoulder-width apart and holding the barbell with your palms facing upward, hands slightly wider than shoulder-width apart.
- Segment 1 (Bottom half): Begin the first seven repetitions by curling the barbell only through the bottom half of the range of motion.
- Start with the barbell at the bottom position (arms fully extended), and curl it only halfway up, stopping when your forearms are parallel to the ground.
- Segment 2 (Top Half): For the subsequent seven repetitions, perform curls through the top half of the range of motion.
- Start with the barbell at the midpoint of the range, curling it from there to the fully contracted position (forearms perpendicular to the ground).
- Segment 3 (Full Range): Complete the final seven repetitions by performing full-range curls.
- Begin with the barbell at the bottom position and curl it through the entire range of motion, bringing it to the fully contracted position.
- Controlled Movements: Maintain control over the barbell throughout all three segments, avoiding jerking or swinging motions. Focus on a smooth and deliberate movement to ensure proper muscle engagement.
- Breathing: Exhale as you lift the barbell and inhale as you lower it. Maintain steady and controlled breathing throughout the exercise.
Key Tips:
- Choose a weight that challenges you throughout all three segments.
- Emphasize the mind-muscle connection, focusing on the sensation of your biceps contracting during each phase.
Common Mistakes to Avoid:
- Using Momentum: Avoid using body momentum to swing the barbell. Keep the movement controlled.
- Lifting Too Heavy: Select a weight that allows you to complete all 21 repetitions with good form.
- Incomplete Range of Motion: Ensure you complete each segment with the specified range, whether the bottom half, top half, or full range of motion.
Incorporate Barbell 21’s into your bicep workout to add variety and intensity, providing a unique challenge for your muscles.
7. Dumbbell 21’s
Watch this video on YouTube
Exercise Description: This involves dividing the curl into three parts—bottom half, top half, and full range of motion—adding variety and intensity to bicep training.
- Equipment Needed: Dumbbells
- Primary Movers: Biceps Brachii
- Assisting Movers: Brachialis, Brachioradialis
- Key Benefits: Unilateral training for muscle balance increases range of motion.
Dumbbell 21’s are a challenging and effective bicep exercise that involves dividing the typical range of motion into three segments. Here’s a step-by-step guide on how to perform Dumbbell 21’s:
Muscles Targeted:
- Primary: Biceps Brachii
- Assisting: Brachialis, Brachioradialis
Equipment Needed:
Steps: Here’s a step-by-step guide on how to perform this exercise.
- Select Appropriate Weight: Choose dumbbells that are suitable for your fitness level. It’s recommended to start with a lighter weight since the cumulative effect of 21 repetitions can be challenging.
- Starting Position: Stand with your feet shoulder-width apart, holding a dumbbell in each hand.Allow your arms to fully extend, and position the dumbbells at your sides with your palms facing forward.
- Segment 1 (Bottom Half): Begin the first seven repetitions by curling the dumbbells only through the bottom half of the range of motion. Start with the dumbbells at the bottom position (arms fully extended), and curl them only halfway up, stopping when your forearms are parallel to the ground.
- Segment 2 (Top Half): For the next seven repetitions, perform curls through the top half of the range of motion. Start with the dumbbells at the midpoint of the range, curling them from there to the fully contracted position (forearms perpendicular to the ground).
- Segment 3 (Full Range): Complete the final seven repetitions by performing full-range curls. Begin with the dumbbells at the bottom position, and curl them through the entire range of motion, bringing them to the fully contracted position.
- Controlled Movements:Throughout all three segments, maintain control over the dumbbells, avoiding any jerking or swinging motions.Focus on a smooth and deliberate movement to ensure proper muscle engagement.
- Breathing: Exhale as you lift the dumbbells and inhale as you lower them. Maintain steady and controlled breathing throughout the exercise.
- Repeat: Perform a total of 21 repetitions, divided into the three segments, to complete one set.
Key Tips:
- Choose a weight that challenges you but allows for proper form throughout all three segments.
- Emphasize the mind-muscle connection, focusing on the sensation of your biceps contracting during each phase.
Common Mistakes to Avoid:
- Using Momentum: Avoid using body momentum to swing the dumbbells. Keep the movement controlled.
- Lifting Too Heavy: Select a weight that allows you to complete all 21 repetitions with good form.
- Incomplete Range of Motion: Ensure you complete each segment with the specified range, whether it’s the bottom half, top half, or full range of motion.
Incorporate Dumbbell 21’s into your bicep workout to add variety and intensity, providing a unique challenge for your muscles.
8. Dumbbell Concentration Curls
Watch this video on YouTube
Exercise Description: An isolation exercise performed seated, focusing on one arm at a time to emphasize the long head of the biceps.
- Equipment Needed: Dumbbell, Bench
- Primary Movers: Biceps Brachii
- Assisting Movers: Brachialis, Brachioradialis
- Key Benefits: Isolation exercise emphasizes the long head of the biceps.
Performing Dumbbell Concentration Curls is an effective way to isolate and target the biceps, emphasizing the brachialis and brachioradialis. This exercise is typically done seated to eliminate body momentum and maximize the focus on the biceps.
Muscles Targeted:
- Primary: Brachialis, Brachioradialis, Biceps Brachii
- Assisting: Deltoids
Equipment Needed:
- Dumbbell
- Flat Bench
Steps: Here’s a step-by-step guide on how to perform Dumbbell Concentration Curls.
- Set Up: Place a flat bench in an open space. Sit on the bench with your feet planted firmly on the ground, creating a stable base. Hold a dumbbell in one hand with an underhand grip (palm facing upward).
- Positioning: Spread your legs to create enough space for your arm to move freely between them.
- Lean forward, and position the elbow of the arm holding the dumbbell on the inside of your corresponding thigh.
- Starting Position: Fully extend your arm downward, allowing the dumbbell to hang between your legs. Ensure your back is straight, and your chest is up.
- Curling Movement: Exhale as you flex your elbow, curling the dumbbell upward.Keep your upper arm against the inside of your thigh throughout the movement.
- Top Position: At the top of the movement, your forearm should be perpendicular to the ground, and the dumbbell should be close to your shoulder. Hold the contracted position for a brief moment, squeezing your biceps.
- Lowering Phase: Inhale as you lower the dumbbell back to the starting position in a controlled manner. Maintain control over the descent, avoiding any rapid dropping of the weight.
- Repeat: Perform the desired number of repetitions with one arm before switching to the other arm.
Key Tips:
- Choose a weight that allows you to maintain proper form and control throughout the set.
- Focus on the mind-muscle connection, feeling the contraction in your biceps with each repetition.
- Keep your back straight and chest up to avoid rounding your shoulders.
Common Mistakes to Avoid:
- Using Momentum: Avoid using body momentum to lift the dumbbell. The movement should be controlled.
- Lifting Too Heavy: Choose a weight that allows you to complete the exercise with proper form.
- Incomplete Range of Motion: Ensure you fully extend your arm at the bottom of the movement and contract your biceps at the top.
Incorporate Dumbbell Concentration Curls into your bicep workout to target the muscles effectively and add variety to your training routine. This exercise is particularly useful for developing the peak of the biceps.
9. Dumbbell Hammer Curls (Neutral Grip)
Watch this video on YouTube
Performing Dumbbell Hammer Curls with a neutral grip is a great arm exercise for targeting the brachialis, brachioradialis, and the lateral head of the biceps.
Muscles Targeted:
- Primary: Brachialis, Brachioradialis, Lateral Head of the Biceps
- Assisting: Deltoids
Equipment Needed:
- Dumbbells
Steps: Here’s a step-by-step guide on how to perform this exercise.
- Starting Position:Stand shoulder-width apart, with a dumbbell in each hand. Allow your arms to extend fully. Your palms should have a neutral grip with palms facing each other.
- Body Position: Maintain a straight posture with your chest up and shoulders back. Engage your core to stabilize your spine.
- Elbow Position: Keep your elbows close to your torso throughout the exercise.
- Curling Movement: Exhale as you flex your elbows, curling the dumbbells upward. Keep your wrists in a neutral position throughout the movement.
- Top Position: At the top of the movement, your forearms should be perpendicular to the ground. Hold the contracted position for a brief moment, squeezing your biceps.
- Lowering Phase: Inhale as you lower the dumbbells. Avoid letting the weights drop quickly, maintaining control over the descent.
Key Tips:
- Control the movement throughout the set.
- Keep your wrists in a neutral position, avoiding excessive extension or flexion.
- Maintain a controlled pace, focusing on muscle engagement rather than using momentum.
Common Mistakes to Avoid:
- Swinging the Body: Keep your body still and avoid using momentum to lift the dumbbells.
- Lifting Too Heavy: Use a proper weight to perform the exercise correctly.
- Incomplete Range of Motion: Extend your arms at the bottom of the movement and contract your biceps at the top.
Incorporate Dumbbell Hammer Curls into your bicep workout to target different aspects of your arm muscles and add variety to your training routine. This exercise is particularly beneficial for building strength and size in the biceps muscles.
10. Preacher Curl Exercise
Watch this video on YouTube
Performing the preacher curl exercise effectively isolates the biceps, particularly the brachialis and brachioradialis. The preacher curl is usually done using a preacher curl bench.
Muscles Targeted:
- Primary: Brachialis, Brachioradialis, Biceps Brachii
Equipment Needed:
- Preacher Curl Bench
- Barbell or EZ Curl Bar
- Weight Plates
Steps: Here’s a step-by-step guide.
- Set-Up: Adjust the preacher curl bench to a height that allows your armpits to rest comfortably on the angled part of the bench. Load the barbell with the desired weight plates. Start with a weight that will enable you to maintain proper form.
- Body Position: Sit on the preacher’s bench with your chest against the pad and your feet flat on the floor. Hold the barbell with your palms facing up); hands placed slightly wider than shoulder-width apart.
- Elbow Position: Allow your arms to fully extend, and position your upper arms against the preacher bench pad. Keep your elbows under your shoulders and your chest firmly against the pad.
- Curling Movement: Exhale as you flex your elbows, curling the barbell upward. Keep your upper arms pressed into the pad throughout the movement, ensuring the isolation of the biceps.
- Top Position: At the top of the movement, your forearms should be perpendicular to the floor, and the barbell should be close to your chest. Hold the contracted position briefly, emphasizing the peak contraction of the biceps.
- Lowering Phase: Inhale as you lower the weight Maintain control over the descent, and avoid letting the barbell drop too quickly.
Key Tips:
- Choose a weight that allows you to control the proper form.
- Keep your upper arms against the preacher bench pad throughout the exercise to maximize bicep isolation.
- Maintain a neutral wrist position to reduce strain on the joints.
Common Mistakes to Avoid:
- Swinging the Body: Keep your body still and avoid using momentum to lift the barbell.
- Lifting Too Heavy: Choose a weight that allows you to control the movement
- Incomplete Range of Motion: Extend your arms to the bottom of the movement and contract your biceps at the top.
Incorporate preacher curls into your bicep workout to target the muscles effectively and add variety to your training routine.
11. Resistance Band Curls
Watch this video on YouTube
Performing Resistance Band Curls is an excellent way to target your biceps using versatile and portable resistance bands.
Muscles Targeted:
- Primary: Biceps Brachii
- Assisting: Brachialis, Brachioradialis
Equipment Needed:
- Resistance Band
Steps: Here’s a step-by-step guide on how to perform Resistance Band Curls.
- Choose the Right Band: Choose a resistance band with an appropriate level of resistance. Bands come in different colors, each indicating a different resistance level.
- Set-Up: Secure one end of the resistance band under your foot. Alternatively, you can anchor it to a sturdy object at a low level, ensuring it won’t slip.
- Starting Position: Stand with your feet shoulder-width apart, ensuring a stable base. Hold the other end of the resistance band with an underhand grip, hands positioned slightly wider than shoulder-width apart.
- Elbow Position: Allow your arms to fully extend, letting the resistance band rest against the front of your thighs. Keep your elbows close to your torso, and ensure your wrists are neutral.
- Curling Movement: Exhale as you flex your elbows, curling the resistance band upward. Keep your upper arms stationary and close to your body throughout the movement.
- Top Position: At the top of the movement, your forearms should be perpendicular to the floor, and the resistance band should be close to your chest. Hold the contracted position briefly, emphasizing the peak contraction of the biceps.
- Lowering Phase: Inhale as you lower the resistance band in a controlled manner. Maintain control over the descent, avoiding any rapid release of tension in the band.
Key Tips:
- Choose a resistance band with the proper tension to perform the exercise with the correct form.
- Keep your core braced throughout the movement.
- Maintain a neutral wrist position to reduce strain on the joints.
Common Mistakes to Avoid:
- Using Momentum: Avoid using body momentum to swing the resistance band. Keep the movement controlled.
- Excessive Forward Lean: Keep your torso upright and avoid leaning forward during the exercise.
- Lifting Too Heavy: Choose a band with the appropriate resistance level for your strength.
Incorporate Resistance Band Curls into your bicep workout as a portable and effective alternative to free weights. This exercise provides continuous tension throughout the movement for optimal muscle engagement.
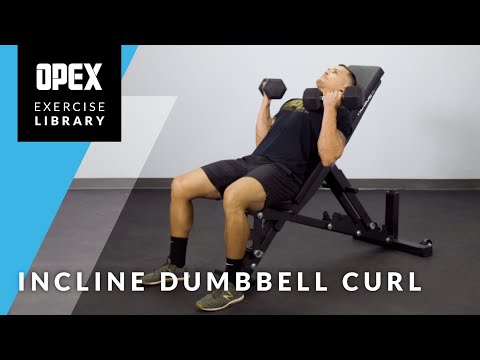
12. Incline Dumbbell Curls
Watch this video on YouTube
Performing Incline Dumbbell Curls is an effective way to target the biceps from a different angle, specifically the long head of the biceps.
Muscles Targeted:
- Primary: Long Head of the Biceps Brachii
- Assisting: Brachialis, Brachioradialis
Equipment Needed:
- Incline Bench
- Dumbbells
Steps: Here’s a step-by-step guide on how to perform Incline Dumbbell Curls.
- Set-Up: Position the incline bench at a 45-degree angle angle. Sit on the bench with a dumbbell in each hand, allowing your arms to extend downward fully.
- Body Position: Sit with your back against the incline bench, ensuring your head, shoulders, and upper back are supported. Keep your feet on the floor, shoulder-width apart, for stability.
- Grip: Hold a dumbbell in each hand with an underhand grip (palms facing upward), allowing your arms to hang straight down.
- Elbow Position: Keep your upper arms stationary against the incline bench throughout the exercise. Ensure your elbows are fully extended at the start of the movement.
- Curling Movement: Exhale as you flex your elbows, curling the dumbbells upward. Keep your upper arms and back against the incline bench to isolate the biceps.
- Top Position: At the top of the movement, your forearms should be perpendicular to the floor, and the dumbbells should be close to your shoulders. Hold the contracted position briefly, emphasizing the peak contraction of the biceps.
- Lowering Phase: Inhale as you lower the dumbbells. Maintain control over the descent, avoiding any rapid dropping of the weights.
Key Tips:
- Keep your back firmly against the incline bench to maximize bicep isolation.
- Maintain a neutral wrist position to reduce strain on the joints.
Common Mistakes to Avoid:
- Using Momentum: Avoid using body momentum to swing the dumbbells. Keep the movement controlled.
- Lifting Too Heavy: Use
- Incomplete Range of Motion: .
Incorporate Incline Dumbbell Curls into your bicep workout to target the long head of the biceps and add variety to your training routine. This exercise is particularly beneficial for developing the upper portion of the bicep muscle.
13. Seated Dumbbell Curls
Watch this video on YouTube
Performing Seated Dumbbell Curls is a great way to isolate and target the biceps, providing stability and control during the exercise.
Muscles Targeted:
- Primary: Biceps Brachii
- Assisting: Brachialis, Brachioradialis
Equipment Needed:
- Dumbbells
- Seated Bench
Steps: Here’s a step-by-step guide on how to perform Seated Dumbbell Curls.
- Set-Up: Sit on a sturdy, flat bench with a dumbbell in each hand. Place your feet flat on the floor to ensure a stable base. Feet should be approximately shoulder-width apart,
- Grip: Hold a dumbbell in each hand with an underhand grip (palms facing upward), allowing your arms to extend downward fully.
- Elbow Position: Keep your upper arms stationary against your torso throughout the exercise. Ensure your elbows are fully extended at the start of the movement.
- Curling Movement: Exhale as you flex your elbows, curling the dumbbells upward. Keep your upper arms against your torso to isolate the biceps.
- Top Position: At the top of the movement, your forearms should be perpendicular to the floor, and the dumbbells should be close to your shoulders. Hold the contracted position briefly, emphasizing the peak contraction of the biceps.
- Lowering Phase: Inhale as you lower the dumbbells, and inhale as you curl the dumbbells. Maintain control over the descent, avoiding any rapid dropping of the weights.
Key Tips:
- Select the proper weight.
- Keep your back straight and your chest up during the exercise.
- Maintain a neutral wrist position to reduce strain on the joints.
Common Mistakes to Avoid:
- Using Momentum: Avoid using body momentum to swing the dumbbells. Keep the movement controlled.
Seated Dumbbell Curls provide a stable and controlled environment for targeting the biceps. Incorporate this exercise into your bicep workout to build strength and definition in your arm muscles.
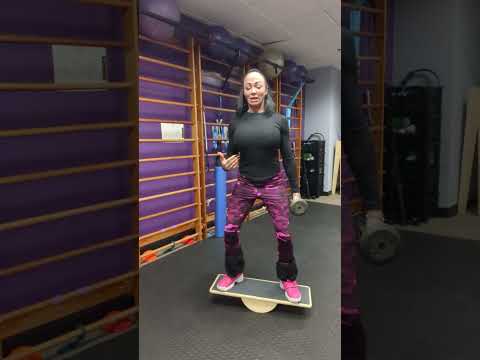
14. Balance Board Dumbbell or Barbell Curls
Performing Balance Board Dumbbell Curls adds an element of instability, engaging additional stabilizing muscles while targeting your biceps.
Muscles Targeted:
- Primary: Biceps Brachii
- Assisting: Brachialis, Brachioradialis, Stabilizing Muscles
Equipment Needed:
- Dumbbells or Barbell
- Balance Board
Steps: Here’s a step-by-step guide on how to perform Balance Board Dumbbell or Barbell Curls.
- Set-Up:Place a balance board on a flat, stable surface. Stand on the balance board with your feet hip-width apart, ensuring even weight distribution on both feet.Hold a dumbbell in each hand with an underhand grip (palms facing upward); arms fully extended downward.
- Balancing Position: Engage your core muscles to maintain stability on the balance board. Keep your spine straight, shoulders back, and chest up.
- Elbow Position: Allow your upper arms to remain stationary against your torso throughout the exercise. Ensure your elbows are fully extended at the start of the movement.
- Curling Movement: Exhale as you flex your elbows, curling the dumbbells upward. Keep your upper arms against your torso to isolate the biceps. Maintain balance on the board as you lift the weights.
- Top Position: At the top of the movement, your forearms should be perpendicular to the floor, and the dumbbells should be close to your shoulders. Hold the contracted position briefly, emphasizing the peak contraction of the biceps.
- Lowering Phase: Throughout the lowering phase, you should be inhaling, whereas you should exhale as you raise the weights. Maintain control over the descent, balancing on the board throughout.
Key Tips:
- Balance and proper form throughout the set.
- Focus on a fixed point in front of you to help with balance.
- Start with a light weight to get accustomed to the balance board, then gradually increase the resistance.
Common Mistakes to Avoid:
- Using Momentum: Avoid using body momentum to swing the dumbbells. Keep the movement controlled.
- Neglecting Core Engagement: Keep your core engaged throughout the exercise to enhance stability.
Balance Board Dumbbell Curls challenge your coordination and stability while targeting your biceps. Incorporate this exercise into your routine to add variety and engage stabilizing muscles for a more comprehensive workout.
15. Bosu Ball Hammer Curls
Performing Bosu Ball Hammer Curls is a dynamic exercise that adds an element of instability, engaging your core and stabilizing muscles while targeting the biceps.
Muscles Targeted:
- Primary: Biceps Brachii
- Assisting: Brachialis, Brachioradialis, Stabilizing Muscles (especially core)
Equipment Needed:
- Bosu Ball
- Dumbbells
Steps: Here’s a step-by-step guide on how to perform Bosu Ball Hammer Curls.
- Set-Up: Place the Bosu Ball on a flat, stable surface with the flat side facing up. Stand with your feet hip-width apart on either side of the Bosu Ball. Hold a dumbbell in each hand with a neutral grip; arms fully extended downward.
- Balancing Position: Engage your core muscles to maintain stability on the Bosu Ball. Keep your spine straight, shoulders back, and chest up. Place one foot on each side of the Bosu Ball, distributing your weight evenly.
- Elbow Position: Allow your upper arms to remain stationary against your torso throughout the exercise. Ensure your elbows are fully extended at the start of the movement.
- Curling Movement: Exhale as you flex your elbows, curling the dumbbells upward. Keep your upper arms against your torso to isolate the biceps. Maintain balance on the Bosu Ball as you lift the weights.
- Top Position: At the top of the movement, your forearms should be perpendicular to the floor, and the dumbbells should be close to your shoulders. Hold the contracted position briefly, emphasizing the peak contraction of the biceps.
- Lowering Phase: Inhale as you lower, exhale as you return the dumbbells to the top of the movement. Maintain control over the descent, balancing on the Bosu Ball throughout.
Key Tips:
- Choose the appropriate weight to maintain balance and proper form throughout the set.
- Focus on a fixed point in front of you to help with balance.
- Start with a lightweight to get accustomed to the Bosu Ball, then gradually increase the resistance.
Common Mistakes to Avoid:
- Using Momentum: Avoid using body momentum to swing the dumbbells. Keep the movement controlled.
- Neglecting Core Engagement: Keep your core engaged throughout the exercise to enhance stability.
To sum it up, Bosu Ball Hammer Curls provide a unique challenge by incorporating instability into the exercise. This variation helps engage stabilizing muscles and enhances overall core strength.
16. Barbell Spider Curls
Watch this video on YouTube
Performing Barbell Spider Curls is an isolation exercise targeting the biceps, especially the short head. The spider curl is typically done on a preacher or incline bench.
Muscles Targeted:
- Primary: Short Head of the Biceps Brachii
- Assisting: Brachialis, Brachioradialis
Equipment Needed:
- Barbell
- Preacher Bench or Incline Bench
Steps: Here’s a step-by-step guide on how to perform Barbell Spider Curls.
- Set-Up: Position a preacher bench or an incline bench at a 45-degree angle. Stand facing the preacher or incline bench, and adjust the height to ensure your armpits rest comfortably on the top of the bench.
- Grip: Stand with your chest against the angled pad of the bench. Hold a barbell with an underhand grip or palms facing upward, hands placed slightly wider than shoulder-width apart.
- Elbow Position: Allow your arms to fully extend downward, ensuring your elbows are directly under your shoulders. Your chest should be firmly against the pad, and your feet should be shoulder-width apart for stability.
- Curling Movement: Exhale as you flex your elbows, curling the barbell upward. Keep your upper arms against the pad, ensuring isolation of the biceps. The range of motion is limited to the top half of the curl, emphasizing the contraction of the short head of the biceps.
- Top Position: At the top of the movement, your forearms should be perpendicular to the floor, and the barbell should be close to your chest. Hold the contracted position briefly, emphasizing the peak contraction of the biceps.
- Lowering Phase: Inhale as you lower the barbell back to the start. Maintain control over the descent, ensuring the barbell doesn’t touch the bench.
Key Tips:
- Choose the appropriate weight to maintain proper form throughout the set.
- Keep your upper arms against the pad to maximize isolation of the biceps.
- Maintain a neutral wrist position to reduce strain on the joints.
Common Mistakes to Avoid:
- Using Momentum: Avoid using body momentum to swing the barbell. Keep the movement controlled.
- Incomplete Range of Motion: Extend your arms at the bottom of the movement and contract your biceps at the top.
Incorporate Barbell Spider Curls into your bicep workout to target the short head of the biceps and add variety to your training routine. This exercise is particularly effective for emphasizing the peak of the biceps.
Conclusion: Elevating Your Bicep Workout with Cable Bicep Curl Alternatives
In conclusion, incorporating a cable bicep curl alternative (think free weights) into your workout routine can yield significant benefits. Understanding the anatomy of the bicep is the foundation for practical training, and the diverse range of exercises outlined provides ample opportunities for growth and definition by targeting specific muscle fibers.
From traditional barbell curls to innovative balance board dumbbells and barbell reverse curls, these alternatives offer variety, target different muscle groups, and prevent stagnation in your fitness journey.
So, whether you’re aiming for bigger biceps, improved muscle balance, or a more challenging workout, these cable bicep curl alternatives can be the key to unlocking your arm’s full potential. Explore, engage, and elevate your bicep training to new heights.
Until next time,
Christian Graham—NSCA-CPT, CFSC2, FMS2, KB, VIPR
Functional Strength & Mobility Specialist – @Body360Fit
PS. And remember, you’re just one workout away…
PPS. Did you enjoy reading this article? If so, please share it with your friends on Twitter, Facebook and Pinterest.
If you have have any questions, please ask in the comments below. You can also send me a message via the contact form.
Additional Learning
Latest Posts
- Ditch the Barbell: 15 Killer Barbell Front Squat Alternatives (with Videos!)
- 7 Unilateral Back Exercises You NEED to Be Doing (For Symmetry & Strength)
- Vega vs. Orgain Protein Powder: A Head-to-Head Comparison
- Indulge Your Cravings: Healthy Cookies and Cream Protein Powder Recipe
- Tribulus Terretris Spotlight: Unveiling the Top 11 Tribulus Supplements with Expert Insights





![Full Body Kettlebell Workout [PDF] | Body360 Fit](https://body360fit.com/wp-content/uploads/2021/01/Full-Body-Kettlebell-Workout-PDF.png)
